- Shower Panels
-
Showering
- Shower Doors & Enclosures
- Walk In Showers
- Shower Trays
- Shower Valves
- Bath Shower Screens
- Shower Accessories & Spares
- Shower Pumps
- View all products...
-
Bathroom Suites
- Complete Bathroom Suites
- Baths
- Toilets & Bidets
- Basins
- View all products...
-
Furniture
- Bathroom Furniture
- Wall Cabinets
- Toilets & Cisterns For Furniture
- Worktops & Vanity Counter Tops
- View all products...
- Taps
- Radiators
- Wet Rooms
-
Ceilings, Floors, Tiles
- PVC Ceiling Panels
- Bathroom Flooring
- Tiles, Tile Trims & Adhesives
- Underfloor / Undertile Heating
- View all products...
- Accessories
- Extras
- Plumbing
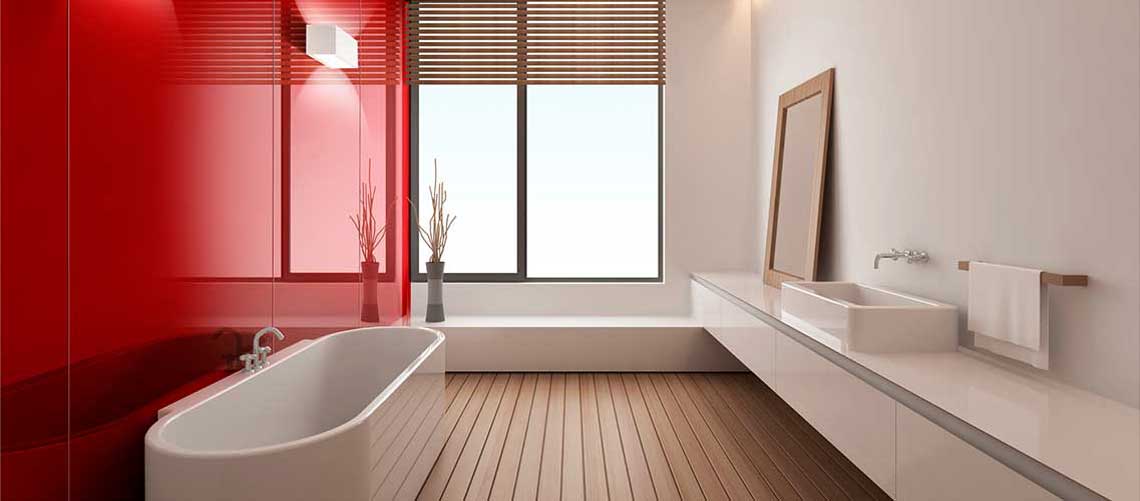
Lustrolite 10 Step Installation Guide
STEP 1 - Remove the protective film from the REAR FACE (i.e. colour side). DO NOT remove the protective film on the front (clear side) of the panel at this time
STEP 2 - Scuff the REAR FACE (colour side) with coarse scouring pad or 120 grit emery paper in order to create a strong adherence to the substrate & remove sanding dust with clean cloth
STEP 3 - After scuffing, ensure the REAR FACE (colour side) is clean and free of dust or any other substance before applying the tape and silicone adhesive
STEP 4 - Apply the 15mm x 1.5mm thick double-coated polyethylene foam tape with synthetic rubber adhesive on the rear surface of each Lustrolite panel. Firmly secure the tape to the panel. Note: The silicone and tape are applied to the COLOUR SIDE i.e. the REAR FACE . The clear side “show face” must face outwards
STEP 5 - Trial fit each panel with tape applied to ensure trim size and expansion gaps are correct (3-4mm)
STEP 6 - Apply a 6mm wide bead of translucent neutral cure silicone in a wavy pattern between each tape strip as shown. Near the edges of the panel, increase the wavy pattern as show in the figure. Run a bead of silicone on the rear of the panel around any holes or cut outs. NOTE: Always use a neutral cure silicone
STEP 7 - Remove the self-adhesive tape liner & Install the panel by resting on removable spacers or wedges at the bottom and use 3-4mm spacers between the panels
STEP 8 - Firmly rub down panel to ensure tape bonds and adhesive contacts the wall. Allow to cure for 24 hours
STEP 9 - Remove the spacers and seal the joints, including all edges of the panel/s such as the floor, the top of the panel/s and all vertical edges with your neutral cure wet area silicone. If the outer protective film of the panel is damaged or not adhered well, peel approximately 40mm of the protective film from panel edges and carefully apply 20mm masking tape either side of the joint. Once gap is filled, remove excess silicone using a soft flexible plastic spatula.
STEP 10 - Immediately after the silicone is applied, carefully remove the outer protective film or masking tape in one continuous movement to achieve the best finish
For further information please see the complete Lustrolite Installation guide here.
To purchase Lustrolite panels please click here.
This guide was created for reference only. www.rubberduckbathrooms.co.uk can not be held responsible for injury or damage caused if you decide to use this method.