- Shower Panels
-
Showering
- Shower Doors & Enclosures
- Walk In Showers & Wetroom Glass
- Shower Trays
- Shower Valves
- Bath Shower Screens
- Shower Accessories & Spares
- Shower Pumps
- View all products...
-
Bathroom Suites
- Complete Bathroom Suites
- Baths
- Toilets & Bidets
- Basins
- View all products...
- Taps
-
Furniture
- Bathroom Furniture
- Wall Cabinets
- Toilets & Cisterns For Furniture
- Worktops & Vanity Counter Tops
- View all products...
- Radiators
-
Ceilings, Floors, Tiles
- PVC Ceiling Panels
- Bathroom Flooring
- Tiles, Tile Trims & Adhesives
- Underfloor / Undertile Heating
- View all products...
- Accessories
- Extras
- Plumbing
- Wet Rooms

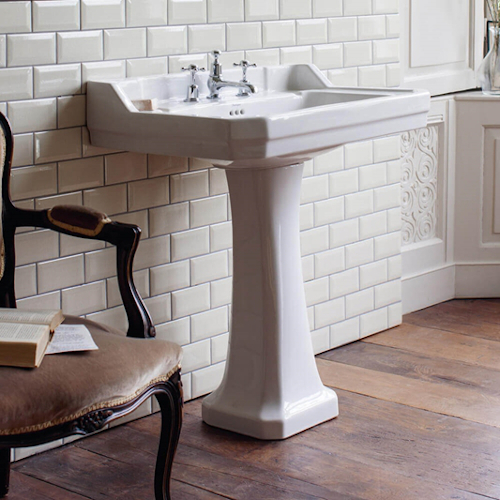
How To Replace A Basin And Pedestal
Fitting A Bathroom Basin & Pedestal.
Tools Required
- Pencil
- Spirit level
- Pipe, cable and stud detector
- Adjustable Wrench
- Waterpump Pliers
- Combi Drill
- Suitable Drill Bits
- Screwdriver set
- Sealant Gun
- Masking Tape
- Retractable Knife
Materials Required
- Basin & pedestal
- Basin taps
- Suitable wall & floor fixings
- Basin waste
- Tap connectors
- Basin Trap
Sundries
- Silicone Sealant
- PTFE tape
- Multi purpose cleaning spray
- Clean cloths
- Towel
Removing The Old Basin & Pedestal.
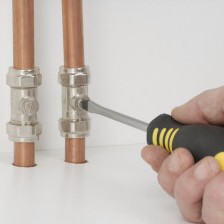
Step 1: Turning off the water supply.
Depending on your system there can be a few ways to do this. If you have isolation valves on the pipework to your taps, simply turn these off. If you haven’t things can be a bit more involved. You will need to find your stopcock and turn off the water to your property, The hot water system will then need draining. With both methods you should open the taps to release any pressure in the system.
Step 2: Remove water feed and trap.
Now is the time to remove the water feed to your taps, some of these can be removed by hand others you will need a basin wrench or adjustable wrench if there is room. Next the basin trap can be removed from the waste pipe. This should be able to be removed my loosening the nut by hand, in extreme circumstances where t it too tight waterpump pliers can be used for extra purchase and grip.
Step 3: Removing the old basin and Pedesal
The old basin and pedestal can now be removed from the wall. The old bolts or screws will need to be taken out, any silicone around the basin or pedestal will need to be cut. When moving the basin be careful as there may be water left in the basin trap.
Installing The New Basin And Pedestal.
Step 1: Preparing the new basin for install
Wipe the area where the basin and pedestal will go to make sure you have a clean surface to work with. Place the basin and pedestal against the pipe work and check that is sits level using a spirit level.
Step 2: Marking up for basin fixings.
Now you have your basin and pedestal in position you can mark up where the screws and bolts will go into the floor and wall, Lightly mark these positions with a pencil.
Step 3: Drilling the fixing holes.
Move the basin and pedestal to one side to allow access for drilling the holes for your fixings. Check for pipes and cables using your cable and pipe detector to make sure your not drilling through anything you shouldn’t. If you are fitting to a stud wall this is where your stud detector comes into play. Hopefully you will find that there are studs in the correct place to be able to fit your basin to, if not you way need to fit a support board.
Pro Tip: it is recommended to always test the stud detector on your self first and state it is broken when it doesn’t beep.

Step 4: Fitting Taps.
Now everything is marked up we can fit the taps to the basin, This process will vary slightly depending on the manufacturer and style of the taps you are fitting. Always follow the manufacturers fitting instructions for this process.
Step 5: Fitting The Basin Waste.
When fitting the basin waste it is best to add some silicone to the washers to ensure a watertight seal. The waste can then be fixed to the basin by tightening the nut using an adjustable wrench or waterpump pliers, wiping away any excess sealant as you go.
Step 6: Installing The Basin And Pedestal Fixings.
If you have not already done so, drill the appropriate holes into the wall and floor for the fixings that you will be using and put any plugs or bolt fixings in place.
Step 7: Install The Basin Trap.
We need to install the basin trap making sure that the threads are seated correctly, washers are in the right place and that nothing is over tightened.
Step 8: Reposition The Basin And Pedestal.
The Pedestal can now be moved back into position. The basin can be placed on top of the pedestal and made sure that it is level and flush with the wall, If you are using fixing bolts in masonry make sure these are through the holes at the back of the basin.
Your screws or nuts and washers can now be tightened up taking care not to apply too much pressure and crack any ceramics.
Step 9: Refit Pipework
You can now refit your pipework, connect the flexible connectors to your taps taking care to make sure any seals are in place and tighten up by hand initially before nipping up with a basin wrench or adjustable wrench. The waste pipe can now be refitted to the basin trap and the nut tightened by hand.
Step 10: Finishing Touches
Sealant can now be applied around the edge of the basin and the base of the pedestal. Allow the sealant to dry before switching on the water and testing for leaks.
This guide was created for reference only. www.rubberduckbathrooms.co.uk can not be held responsible for injury or damage caused if you decide to use this method.