-
Shower Panels & Boards
- Wall Panels by Feature & Colour
- Slat Wall Panels
- Multipanel
- Showerwall
- Perform Panels
- DuraPanel
- BerryAlloc
- Wetwall
- Mermaid Wall Panels
- HydroSafe Wall Panels
- Nuance Bushboard Shower Panels
- Neptune PVC Panels
- Wetpanel M1 PVC
- MEGAboard PVC
- Splashpanel
- ProPlas PVC Panels
- PlumbWall 4 PVC Wall Panels
- Reflect Wall Panels
- Lustrolite Acrylic
- Atlantis Metro Tile Wall
- Masq Revela
- Wall Panel Profiles, Coloured Sealants & Accessories
- View all products...
-
Showering
- Shower Doors & Enclosures
- Shower Trays
- Shower Valves
- Bath Shower Screens
- Shower Accessories & Spares
- Shower Pumps
- View all products...
-
Bathroom Suites
- Complete Bathroom Suites
- Baths
- Toilets & Bidets
- Basins
- View all products...
- Taps
-
Furniture
- Bathroom Furniture
- Wall Cabinets
- Toilets & Cisterns For Furniture
- Worktops & Vanity Counter Tops
- View all products...
- Radiators
- Ceilings, Floors, Tiles
- Accessories
- Extras
- Plumbing
- Wet Rooms
-
Shower Panels & Boards
- Wall Panels by Feature & Colour
- Slat Wall Panels
- Multipanel
- Showerwall
- Perform Panels
- DuraPanel
- BerryAlloc
- Wetwall
- Mermaid Wall Panels
- HydroSafe Wall Panels
- Nuance Bushboard Shower Panels
- Neptune PVC Panels
- Wetpanel M1 PVC
- MEGAboard PVC
- Splashpanel
- ProPlas PVC Panels
- PlumbWall 4 PVC Wall Panels
- Reflect Wall Panels
- Lustrolite Acrylic
- Atlantis Metro Tile Wall
- Masq Revela
- Wall Panel Profiles, Coloured Sealants & Accessories
- View all products...
-
Showering
- Shower Doors & Enclosures
- Shower Trays
- Shower Valves
- Bath Shower Screens
- Shower Accessories & Spares
- Shower Pumps
- View all products...
-
Bathroom Suites
- Complete Bathroom Suites
- Baths
- Toilets & Bidets
- Basins
- View all products...
- Taps
-
Furniture
- Bathroom Furniture
- Wall Cabinets
- Toilets & Cisterns For Furniture
- Worktops & Vanity Counter Tops
- View all products...
- Radiators
- Ceilings, Floors, Tiles
- Accessories
- Extras
- Plumbing
- Wet Rooms
How to install a wall hung toilet
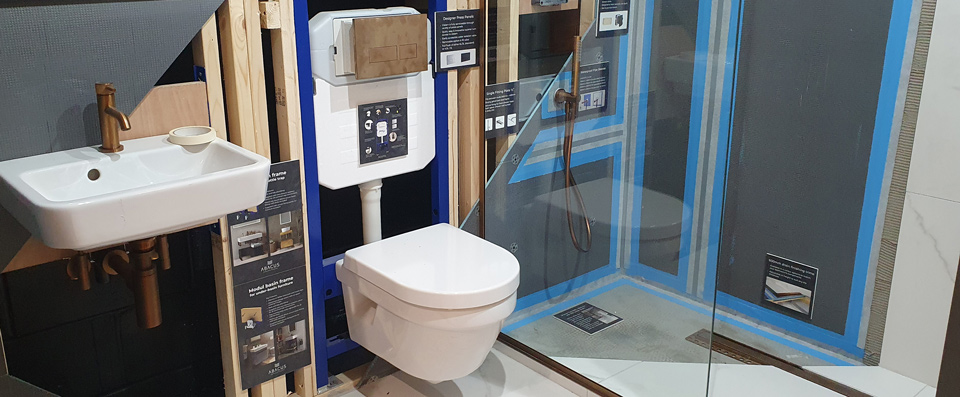
Installing a wall-hung toilet is becoming more and more popular in the UK. Wall hung toilets are great for adding a modern sleek look to your bathroom. Unlike traditional toilets, wall-hung toilets are mounted to the wall and look like they are floating in the air, which not only looks stylish but has the added benifit of making it easier to clean the floor underneath and around the toilet.
Installaing a wall hung toilet is not a project for a novice DIYer and involves plumbing and carpentry work, which requires some level of experience and expertise.
In this article, we will guide you through the process of installing a wall-hung toilet
Tools Required To Install A Wall Hung Toilet
Before starting the installation process, it's important to have the right tools on hand. Here's a list of the tools you may need:
- Drill
- Level
- Measuring tape
- Spanners
- Adjustable wrenches
- Hole saw
- Spirit level
- Silicone gun
- Stanley Knife
- Marker Pen
Some manufacturers may provide additional or specific tools necessary for their product, so be sure to check the product manual before beginning. It's also important to ensure that you have the necessary safety gear, such as gloves and eye protection, before starting the installation. Having the right tools and safety gear can help make the installation process smoother and safer.
Items Required
In addition to the tools, you'll also need to have the necessary parts for the installation.
It's important to note that the specific parts required may vary depending on the manufacturer and model of the wall-hung toilet you choose. Before beginning the installation, make sure you have all the necessary parts by referring to the product manual or consulting with the manufacturer. Missing or incorrect parts can cause delays or issues during the installation process.
You may also need some CLS woodwork, plasterboard or tilebacker board to construct walls and boxing around the toilet fixing frame. You will also require your finishing surface (tiles etc).
Pre-Installation Preparation
Before starting the installation process, it's important to take some time to prepare the space and ensure that everything is in order.
- Check the wall: Before installing the wall-hung toilet, make sure the wall is strong enough to support the weight of the toilet and cistern. If the wall is not strong enough, you may need to reinforce it before proceeding or purchase a wall hung frame which is suitable for freestanding.
- Measure and mark: Use a measuring tape to mark the positions of the frame and cistern on the wall. This will help ensure that the installation is level and accurate.
- Cut holes: Use a hole saw to cut any holes in the wall for the waste pipe if required.
Installing the Fixing Frame
Once the space is prepared, the next step is to install the fixing frame.
- Assemble the frame according to the manufacturer's instructions.
- Secure the frame to the floor and wall using appropriate fixings for the type of wall.
- Check that the frame is level using a spirit level and at the correct height.
- Connect the water supply to the cistern.
- Install the wall bracket for the toilet bowl according to the manufacturer's instructions.
- Test for leaks and test funsh into a bucket as required.
It's important to ensure that the fixing frame is securely and levelly fixed to the wall to provide a stable base for the toilet.
Add Your Finish
Now is time to install you plasterboard or tilebacker boards and install your finished surface either tiles, bathroom wall panels or plaster and painted.
Installing the Wall-Hung Toilet Pan & Seat
Now that the fixing frame is installed, the next step is to install the wall-hung toilet.
- Attach the rubber flush gasket into the toilet bowl.
- Insert the fixing bolts into the wall bracket and attach them to the rubber gasket on the toilet bowl.
- Adjust the position of the toilet bowl so that it is level and secure.
- Tighten the fixing bolts using an adjustable wrench or spanner.
- Connect the toilet bowl to the waste pipe using a suitable connector.
- Install the toilet seat according to the manufacturer's instructions.
It's important to take care when installing the toilet bowl to ensure that it is level and securely attached to the fixing frame. This will help prevent any potential leaks or issues with the toilet. Additionally, following the manufacturer's instructions for installing the toilet seat will help ensure a comfortable and functional final product.
Final Steps
With the wall-hung toilet installed, there are just a few final steps to complete the installation:
- Connect the cistern to the flush plate according to the manufacturer's instructions.
- Turn on the water supply to the cistern and check for leaks.
- Test the flush mechanism to ensure that it is functioning properly.
- Install any necessary wall paneling or tiles around the toilet, ensuring that the flush plate and access hatch are still accessible.
- Clean up any debris or waste materials from the installation process.
- Once you have completed these final steps, your wall-hung toilet installation is complete. It's important to take care when installing any plumbing fixtures to ensure that they are secure and functioning properly.
Following the manufacturer's instructions and seeking professional assistance if needed can help ensure a successful installation. We hope you find this information helpful. At Rubberduck Bathrooms we offer a wide range of wall hung toilets, Wall Hung Toilet Fixing Frames and a wide range of concealed cisterns to make your bathroom sleek and modern.
This guide was created for reference only. www.rubberduckbathrooms.co.uk can not be held responsible for injury or damage caused if you decide to use this method.


