- Shower Panels
-
Showering
- Shower Doors & Enclosures
- Walk In Showers & Wetroom Glass
- Shower Trays
- Shower Valves
- Bath Shower Screens
- Shower Accessories & Spares
- Shower Pumps
- View all products...
-
Bathroom Suites
- Complete Bathroom Suites
- Baths
- Toilets & Bidets
- Basins
- View all products...
- Taps
- Furniture
- Radiators
-
Ceilings, Floors, Tiles
- PVC Ceiling Panels
- Bathroom Flooring
- Tiles, Tile Trims & Adhesives
- Underfloor / Undertile Heating
- View all products...
- Accessories
- Extras
- Plumbing
- Wet Rooms
Selkie 2 & 3 Sided Showerboard Enclosure Installation Guide
Selkie Installation Guide For Clean Cut Boards
Required Tools:
- Pencil & Ruler
- Measuring Tape
- Jig saw or Hand saw
- Masking Tape
- Neutral Cure High-Grab Adhesive
- Neutral Cure Silicone Sealant
We recommend using neutral cure adhesive and sealant to ensure the solvents in other products do not damage the panelling.
Wall Prep:
It is important to ensure that walls are totally dry before fitting Selkie panels and any source of damp is treated, wherever possible please remove existing wall coverings such as wall paper and fabrics. As long as the walls are reasonably flat and level there is no need remove tiles before the panels are fitted.
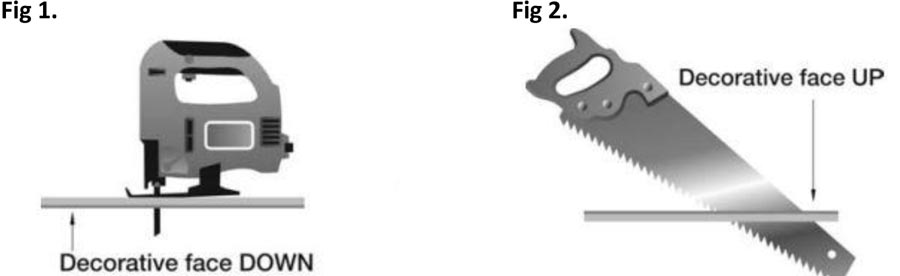
Cutting Panels:
When using a jig saw (fig 1) ensure the panels decorative faces are facing downwards to prevent chipping of the laminate board.
If using a standard hand saw (fig 2) the decorative face should be face up, masking tape may be of use here to mask the line of the cut prior to cutting.
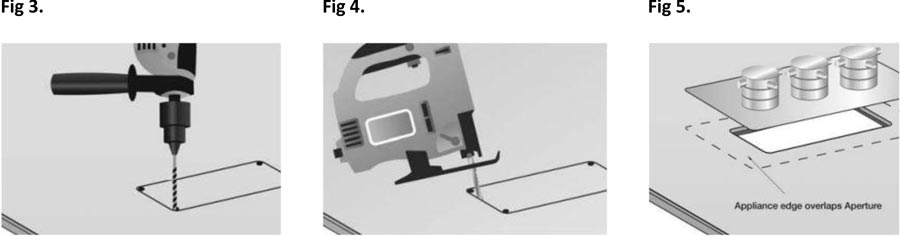
Cutting Apertures:
Selkie boards are very durable however care must be taken when cutting openings in to the boards for shower rails or inspection hatches etc.
Ensure wooden blocks are used below your drilling area to prevent “Burst out” and any chance of damage to the decorative face.
Mark out the shape requiring cutting on to the rear face of the panel then drill positions on the front ensuring one drill hole in each corner of the shape to be cut out.
Drill holes at a suitable spacing all around the inside edge of the shape to be cut out from the front of the panel to prevent damage to the decorative face (fig 3).
Using a jigsaw slowly cut around the inside edge of the shape you are cutting out with the decorative side face down (fig 4).
When using a circular saw or fine-tooth blade hand-saw, panels should be cut decorative side face down.
Please ensure the fittings overlap the aperture cut out once fitted (fig 5).
When measuring the distance from the walls, or past shower enclosures, an allowance must be made for the thickness of the aluminium profiles and the space between the walls and profiles.
2 & 3 Sided Enclosures Installation Guide
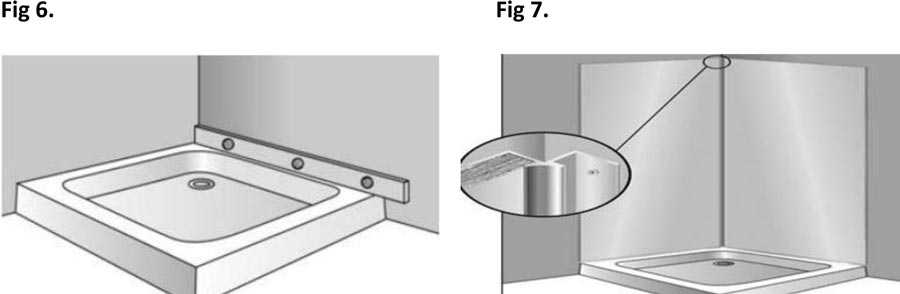
1. Position shower tray or bath level and fix in accordance with the manufacturers instructions. (fig 6).
2. Start by fixing the internal corner trim in to the required position (fig 7) ensuring it is totally plumb and the screws are 100% level with the profile to avoid damage to the boards.
3. Cut the panels to the correct height and width (We recommend removing the protective film from the edges by approximately 5cm to accommodate the fitting of the panels.) After the panels have been cut we advise to offer the panels up to the wall and in to the trims before any silicone sealant or adhesive is added to ensure it all fits correctly.
4. Apply a generous bead of silicone into the channel of the internal corner trim (fig 8).
5. If applying an end cap trim (fig 9) apply a generous bead of silicone sealant along the length of the end cap trim then fix in to position by applying hand pressure all along the end cap and ensure this is fully fixed to the panel.
Fig 8. Fig 9.
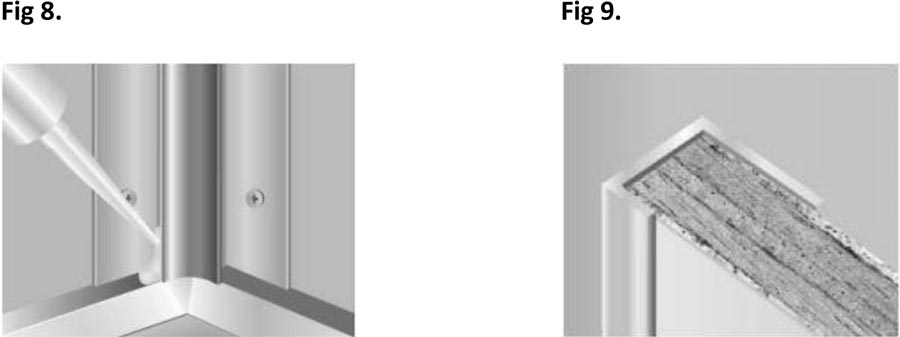
(please ensure you do not apply excessive amounts of sealant to the channels in the trims.)
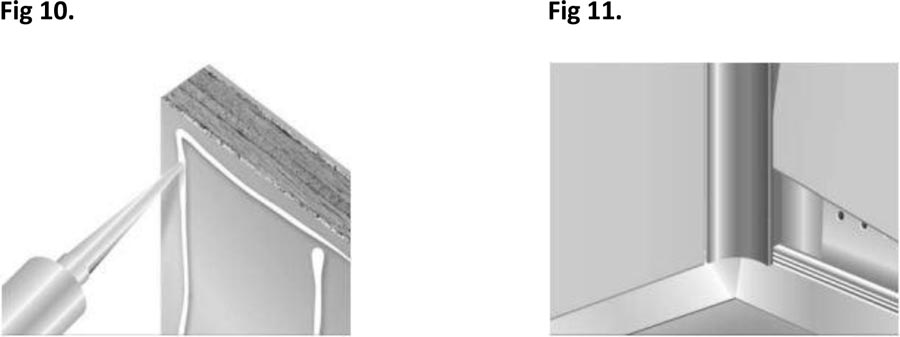
6. Apply a bead of panel adhesive on to the back surface of the panel then in a grid of approximately 30cm squares covering the full area of the panel (fig 10)
7. The Selkie panel should be fitted to be positioned just above the shower tray or bath using packing pieces to ensure a gap of 3mm is left between the panel and shower tray/bath.
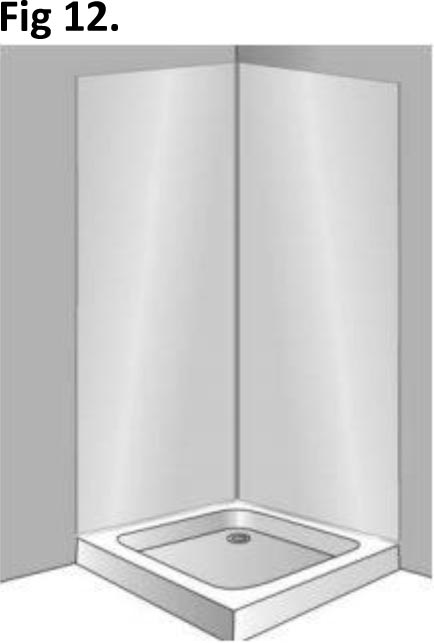
8. Ease the panel into the internal corner trim (fig11).
9. When the adhesive has set and the panels are secured in their position remove the packing pieces from between the shower tray/bath.
10. Fill the gap between the tray/bath and the panel with silicone sealant so the panel is sitting on a bed of sealant.
11. Run a bead of sealant to the edge of the panel filling any gaps ensuring you leave it smooth for a neat finish.
12. Repeat the process for the second panel. 13. Remove the remaining protective coating to complete the installation (fig 12)
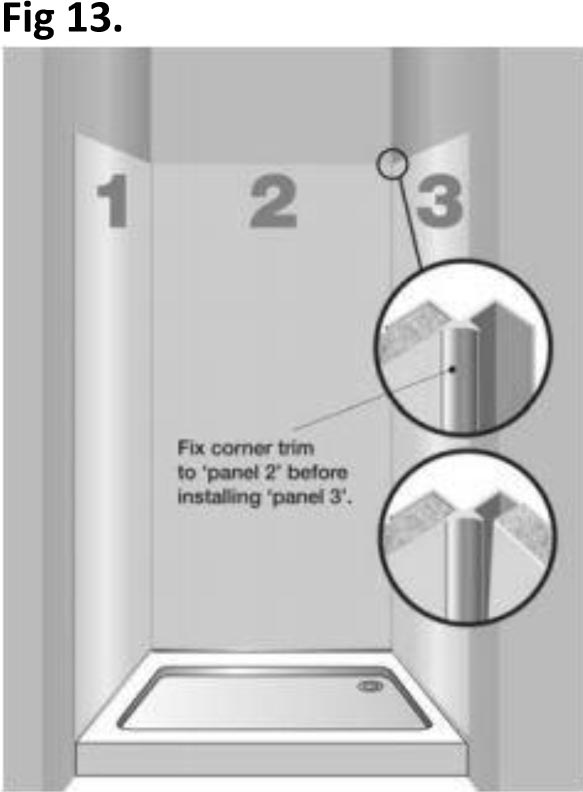
3 Sided Enclosure Installation Guide:
When installing a 3 sided enclosure in a |_| type shape, follow the above guidelines, however ensure that the second internal corner trim is fitted to the second panel (which will be the middle panel) prior to fixing to the wall and before installing panel 3 (fig 13).
Accessories & Sealants:
Finishing Trims: Designed purely for Selkie waterproof panels, these are available in Satin Silver, polished Chrome, White & Black including: Internal and External corners, End Caps, Quad End Cap & `H’ joining trims (for joining 2 consecutive square edged panels together in a run).
Sealants & Adhesives: for best results we recommend that Selkie boards are installed using a high grab adhesive, this will ensure a quickly secured wall panel to the wall surface, for sealing all trims we recommend the use of a neutral cure clear waterproof silicone sealant is used for ALL clean cut board installations
If you are using tongue and groove panels use colour matched sealant from Rearo for a seamless finish - please note however this guide is for clean cut boards and will differ from the instructions needed for tongue & grooved board installations.
Cleaning: Once installed, Selkie boards are very low maintenance and should only be cleaned with warm water and a nonabrasive mild detergent. Scouring products should be avoided, using scouring products or abrasive cleaners will invalidate your warranty.
If you are using a seal kit for your tray or bath such as AquaStrap or Classi Seal please refer to the instructions for the individual product as the above instructions may not fully apply.
To browse the range of available Selkie Shower/Bath Enclosure Kits Click Here
This guide was created for reference only. www.rubberduckbathrooms.co.uk can not be held responsible for injury or damage caused if you decide to use this method.


