- Shower Panels
-
Showering
- Shower Doors & Enclosures
- Walk In Showers
- Shower Trays
- Shower Valves
- Bath Shower Screens
- Shower Accessories & Spares
- Shower Pumps
- View all products...
-
Bathroom Suites
- Complete Bathroom Suites
- Baths
- Toilets & Bidets
- Basins
- View all products...
-
Furniture
- Bathroom Furniture
- Wall Cabinets
- Toilets & Cisterns For Furniture
- Worktops & Vanity Counter Tops
- View all products...
- Taps
- Radiators
- Wet Rooms
-
Ceilings, Floors, Tiles
- PVC Ceiling Panels
- Bathroom Flooring
- Tiles, Tile Trims & Adhesives
- Underfloor / Undertile Heating
- View all products...
- Accessories
- Extras
- Plumbing
How to Cut a Cuttable Shower Tray
Cuttable shower trays are a great solution when your bathroom has awkward sizes or tight spaces. They give you the flexibility to get a perfect fit inside your shower enclosure without needing a made-to-measure tray.
In this guide, we’ll walk you through how to cut a cuttable shower tray safely and accurately.
Important: Not all shower trays can be cut. Always check with the manufacturer before you start.
What You’ll Need
Before you begin, make sure you’ve got the right tools:
- An angle grinder with a diamond blade (or tile cutting blade)
- Masking tape
- A pencil or marker
- Water (to help keep dust down and cool the blade)
- Protective gear (gloves, goggles, dust mask, ear protection)
Make sure the shower tray is placed on a flat, stable surface and fully supported to avoid any cracks or damage while cutting.
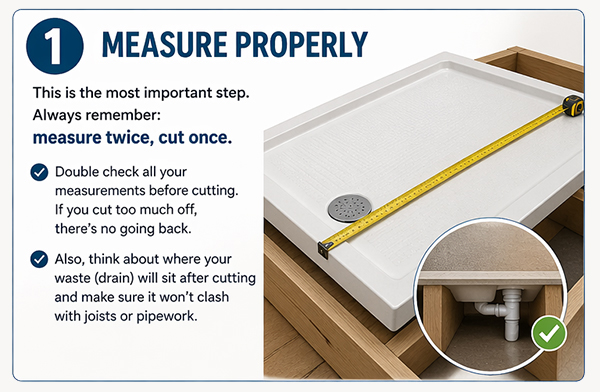
Step 1: Measure Properly
This is the most important step. Always remember: measure twice, cut once.
Double check all your measurements before cutting. If you cut too much off, there’s no going back. Also, think about where your waste (drain) will sit after cutting and make sure it won’t clash with joists or pipework.
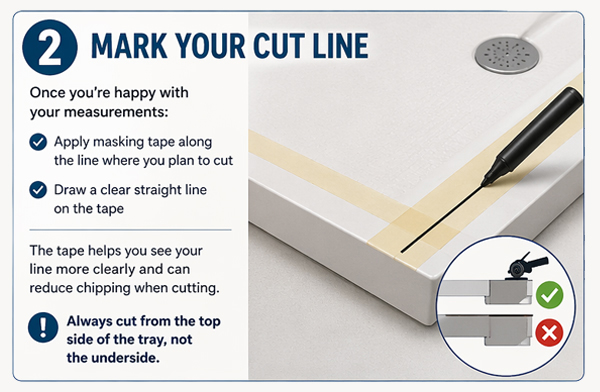
Step 2: Mark Your Cut Line
Once you’re happy with your measurements:
Apply masking tape along the line where you plan to cut
Draw a clear straight line on the tape
The tape helps you see your line more clearly and can reduce chipping when cutting.
Always cut from the top side of the tray, not the underside.
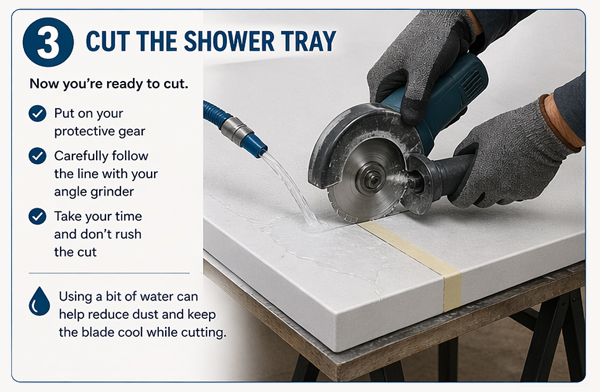
Step 3: Cut the Shower Tray
Now you’re ready to cut.
Put on your protective gear
Carefully follow the line with your angle grinder
Take your time and don’t rush the cut
Using a bit of water can help reduce dust and keep the blade cool while cutting.
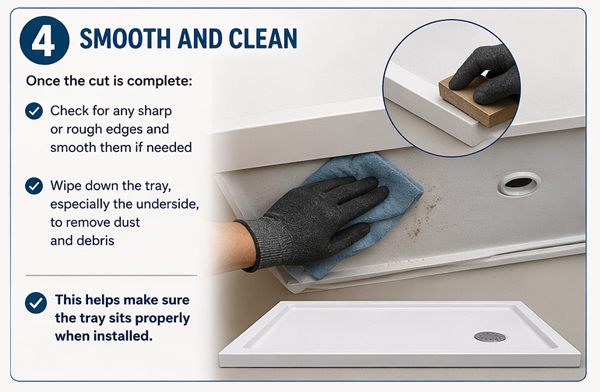
Step 4: Smooth and Clean
Once the cut is complete:
Check for any sharp or rough edges and smooth them if needed
Wipe down the tray, especially the underside, to remove dust and debris
This helps make sure the tray sits properly when installed.
Ready to Install
Once your tray is cut and cleaned, it’s ready to be fitted into place.
Final Tip
Cuttable shower trays are designed to make installation easier, but every product can be slightly different.
Please check your own shower tray’s instructions before cutting to make sure you follow the correct guidelines for your specific model.

Shower Tray Cutting FAQs
Can all shower trays be cut?
No, not all shower trays are cuttable. Only trays that are specifically designed to be cut should be modified. Cutting a standard tray can weaken it, affect drainage, and may void the warranty.
How do I know if my shower tray is cuttable?
Check the product description or manufacturer’s instructions. Cuttable trays are usually labelled as “cut-to-size” and are often made from resin or stone resin materials.
What tools do I need to cut a shower tray?
Most cuttable shower trays can be cut using an angle grinder with a diamond blade or a suitable tile cutting saw. Always wear protective gear like gloves, goggles and a dust mask when cutting.
How much can you cut off a shower tray?
This depends on the specific tray. Some trays have limits on how much can be removed to avoid affecting the slope and drainage. Always follow the manufacturer’s guidance for your exact model.
Can cutting a shower tray affect drainage?
Yes, it can. If you remove too much material or cut the wrong side, you may impact the tray’s gradient, which helps water flow towards the waste.
Should I cut from the top or bottom of the tray?
You should always cut from the top side of the tray. This helps you follow your cutting line accurately and reduces the risk of damage.
Can I cut a shower tray myself or should I get a professional?
You can cut a shower tray yourself if you have the right tools and experience. However, many people choose a professional because mistakes can be costly and irreversible.
What is the best material for a cuttable shower tray?
Resin and stone resin shower trays are commonly designed to be cut. These materials are durable and easier to work with compared to traditional trays.
How do I get a clean edge when cutting a shower tray?
Use masking tape along the cut line and cut slowly with a diamond blade. This helps reduce chipping and gives a cleaner finish.
What happens if I cut a non-cuttable shower tray?
Cutting a tray that isn’t designed to be cut can weaken the structure, cause cracks or leaks and void your warranty.
Do cut edges need finishing?
Yes. After cutting, edges may be rough or sharp. You may need to smooth or seal the edge, especially if it will be visible after installation.
This guide was created for reference only. www.rubberduckbathrooms.co.uk can not be held responsible for injury or damage caused if you decide to use this method.


